|
You can save on the amount of water you flush down your toilet by learning how to use and install a flush converter. A flush converter is a unit that will regulate water waste, therefore saving you money every time you flush. You can save approximately 15,000 gallons of water each year with the use of a flush converter, translating to an approximate 10% reduction on water bill costs.
How do you install a flush converter? Anyone can do it! Not only will a flush converter regulate water waste, but it can be installed by even a novice. In most cases, there are no tools required and the flush converter will drop right into your toilet tank. A flush converter will turn any standard toilet into a water saving toilet in 30 minutes or less. How does a flush converter work? A flush converter replaces the flapper located inside your toilet tank and replaces the standard toilet handle with a new two-option button or handle. One option will allow for liquid waste removal only. The other option is for solid waste removal. The system regulates water waste by using only one-gallon of water for liquid disposal and 3 ½ gallons for solid waste. When you flush, you choose which option is necessary. Does a flush converter fit every type of toilet? A flush converter will fit most standard size toilets, but there are some exceptions. Since each flush converter varies in size, consult the packaging for specifications. However, some considerations may include toilet tank height and valve hole size. How much does a flush converter cost? This simple home improvement should cost you no more than $ 30.00. That's a great price for a product that will regulate water waste and reduce your monthly water costs. Since installation is so simple, you will not have to incur additional labor costs or pay anything further than the price of the flush converter. Where can I buy a flush converter? You can find these items virtually everywhere. Home Depot, Lowe's Home Improvement, Walmart, and online retailers all sell flush converters. One of the top-selling brands is the HydroRight Drop-In Dual Flush Converter. This product received multiple awards for product innovation, and has been recognized as an energy-efficient tool that turns any toilet into a water saving toilet.
0 Comments
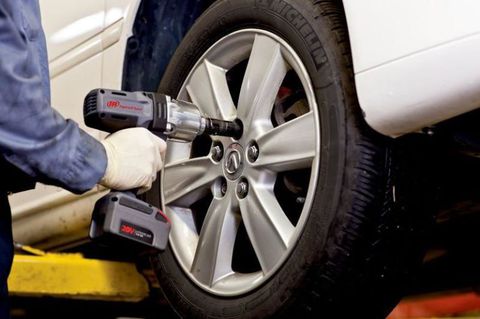 Nowadays people make use of impact wrenches for their essential needs today. In fact, using these tools is quite common and found at every home too. Some impact wrenches are used for home purposes and some for industrial areas, construction sites and all. Based on the requirement, these tools are preferable to use. Moreover, many people go through electric impact wrenches; some may go through cordless impact wrenches too. These two types vary in category wise. The electric one is battery or powered tool, and the cordless tool is also a powerful resource tool but not as high compared to an electronic machine. Whatever the tool or impact wrench we use, choosing the right one based on your need is important here - the best thing to do is to check out Inside Tool and choose wisely. Similarly avoiding wrong wrenches that do not suit your need is also important. Taking this issue into consideration, some mistakes have to be wisely avoided at any cost when you use these impact wrenches mandatorily too. Let’s focus on some of the following mistakes that need to be avoided while using these impact wrenches exclusively. Things to avoid: ⦁ In some cases, the components will be over tightened that is beyond the manufacturer’s requirement. This kind of over tightening will be avoided only in terms of deleting or loosen the tight fitting completely; you require torque wrench in this regard for tightening your fasteners especially. So, over tightening fixings need to be reduced while delivering the material to the users. ⦁ The essence of using this impact wrench is in order to tighten up nuts or bolts which are crossly threaded. So, in this scenario, if the threads got damaged in this process of tightening, it needs to be fixed out. So, to ignore this damage, it should be manually threaded for both bolts and nuts based on your requirement rather than using the impact wrench essentially. ⦁ Be ensuring that some of the electric sockets are not compatible with some kind of impact wrenches. So you are advised to utilize impact wrenches that do not contain any slips. Here cyclic loads are wisely tackled. This is the reason why you should not use mismatched sockets at all. ⦁ Do also ensure that fasteners and fittings size must match the requirement you want. This step may enhance you to purchase the right size. Similarly, the rating of the torque you use must be excellent compared to the torque needed by an actual application. ⦁ Check thoroughly in buying the type of wrench that suits your requirement actually. Especially some kind of impact wrenches does cost you more than does not fits your need. So, avoid selecting the wrong wrench in some cases. For example, consider air impact wrenches that have high power in weighing ratios. Similarly, some electric impact wrenches work out well in terms of more massive machinery works wisely. This is how the selection is essential in choosing the right impact wrench is required. From the above discussion, avoiding some mistake in case of utilizing impact wrenches is essentially needed today. Besides the popularity of using impact wrenches, following precaution and measures is also required for its effective working on your specific requirements is mandatory. 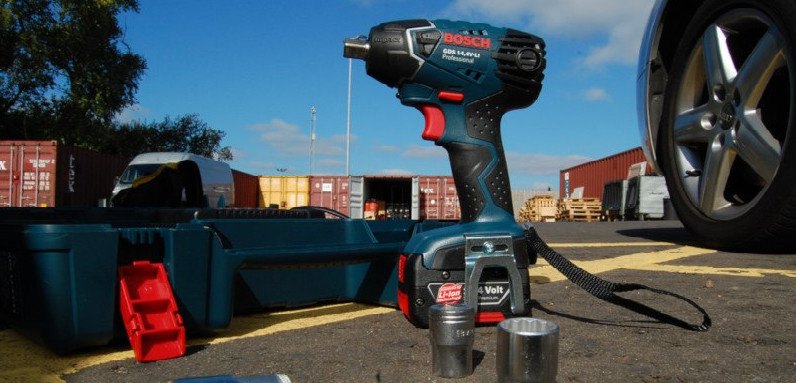 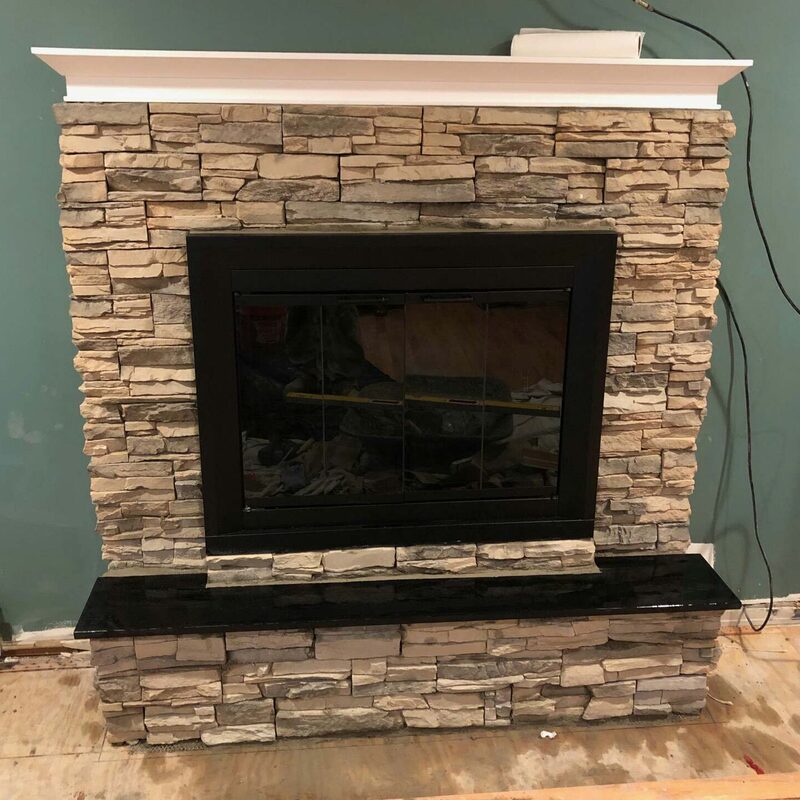 You are preparing your fireplace for the winter season so that you and your family can enjoy the warmth and coziness that a roaring fire brings to your home. A quick inspection of your fireplace and you notice that there is a crack in the brick of the inside lining. How does one repair those cracks in the firebricks?
Most of us know that repairs done on normal brickwork are usually done with mortar. Mortar is a mix used with water to make a paste that is used to build or repair brickwork. However, using mortar in a fireplace can lead to disaster. The water used to make the mortar paste can become steam and perhaps explode. Hot ashes and fire could be all over your floor and hearth. Firebricks should be replaced when they are loose or damaged. Many times, you want to leave that to a professional. An oily substance and highly flammable byproduct of wood burning fireplaces is creosote. This byproduct can build up in the cracks of the firebricks. It can also travel past those cracks into the firebox and other parts of the chimney. Creosote is easily flammable and can ignite quickly. A chimney fire can spread fast into a house fire, giving you good reason to consult a professional on major chimney repairs. However, if you need to simply patch a crack in the joints of the firebricks, use refractory fireclay cement. Most home repair or building supply stores will carry it. First with a stiff, small pointy tool like an old butter knife or pocketknife, remove any loose refractory fireclay around the bricks. Then use the knife to make a small groove where you are going to place the new fireclay cement. Using your knife, force the fireclay cement into the newly carved groove you have made. Let dry before using your fireplace. Now that you have spent some time getting your firebox repaired, you should take a look at your flue liner. Make sure that it is free of debris and that there are no visible cracks. Check your damper and make sure that it works freely. Open and close it several times to make sure it is unobstructed. If you have a chimney cap, and for safety reasons you should, check to see that it is secured firmly and that the screening is in good condition. Finally, while outside check for overhanging tree limbs. These tree limbs could possibly burn or restrict the air draft to your chimney. Keeping your fireplace and chimney clean and safe will enhance your family's enjoyment for years to come. Mechanical paint removal tools consist of scrapers, rasps and sandpaper substitutes to handle removal of old paint from your wood. These are inexpensive paint removal tools so you should keep plenty on hand. When using solvents or chemicals, use plastic or wood scrapers to avoid gouging the wood. Since these paint removal tools create a lot of dust, these methods of paint removal are not recommended to be used on lead based paints. Hook scrapers for removing loose paint from flat surfaces. A hook scraper looks like a large razor. It has a stiff and dull blade. The hook scrapper is used just like a razor. The scraper is pulled toward you to remove loose paint. Push scrapers for paint removal on flat surfaces and corners. Push scrapers resemble putty knives. They come in all different widths and handle sizes. Some push scrapers have dull blades and some have sharpened blades. Push scrapers are not as effective as hook scrapers for removing paint, but they do work well with very loose paint. A push scraper is also more work than a hook scraper. Rasps and adhesive blocks for removing paint on flat surfaces. Rasps and adhesive blocks can scrape and sand. These tools are available in many shapes and sizes. Remove paint with sandpaper substitutes. Sandpaper substitutes are fairly flexible and are able to get into places that the other tools cannot. Most of the sandpaper substitutes are rectangles of a tough cloth coated on both side with sheets of an abrasive coated nylon mesh. These sandpaper substitutes are extremely durable and work fast. These can be wrapped around a sanding block for flat surfaces or around doweling for concave surfaces. The sandpaper substitutes tend to leave surfaces a little too rough for painting so additional light sanding may need to be done prior to painting. Use sponges and glass blocks to remove paint. Sponges wrapped in sandpaper work great for getting paint off from molding and other difficult shapes. There are also and sanding sponges on the markets that are already pre-wrapped. It is however much cheaper to make your own sanding sponge. Sanding sponges can be rinsed out to remove the paint debris and reused. Glass blocks are actually hardened glass foam and look like a hunk of hardened plastic. Glass blocks wear away quickly and will leave residue on your wood surface after using. Consider this when making the choice to use a foam glass block for paint removal. Mechanically removing paint from wood can be a little labor intensive. Removing paint by hand can also be much safer on the environment and your wood. Using paint removal tools by hand can also save a great deal on your pocket. 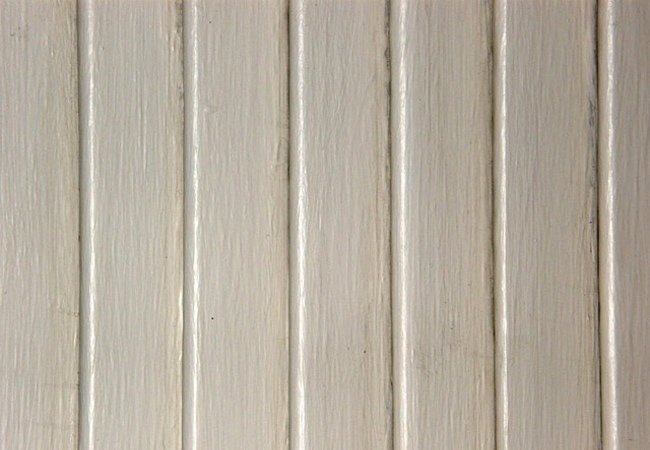 |
